TokenPocket Setup
BSC Wallet Creation/Import Tutorial
How to Create and Import BSC Wallet?
This is a tokenpocket wallet tutorial, and also a binance chain wallet tutorial, guide to creating and importing BSC wallets in Tokenpocket.
This guide provides a simple, step-by-step walkthrough on how to create and import a BSC wallet using TokenPocket. Whether you're a new or existing user, you'll learn everything from selecting the right network to securely backing up your private keys, ensuring a smooth and safe start to your BSC journey.
Part 1: Create BSC Wallet
If you don't have a BSC wallet or BSC USDT wallet yet, follow our guide to create one first.
1 Open TokenPocket
For New Users Creating a Wallet:
Download and open your TokenPocket. On the initial interface, you can choose between [I have an account] or [No accounts] to create or import a wallet. When selecting the wallet network (blockchain), you can either directly select or search for the desired network to proceed with creation/import.
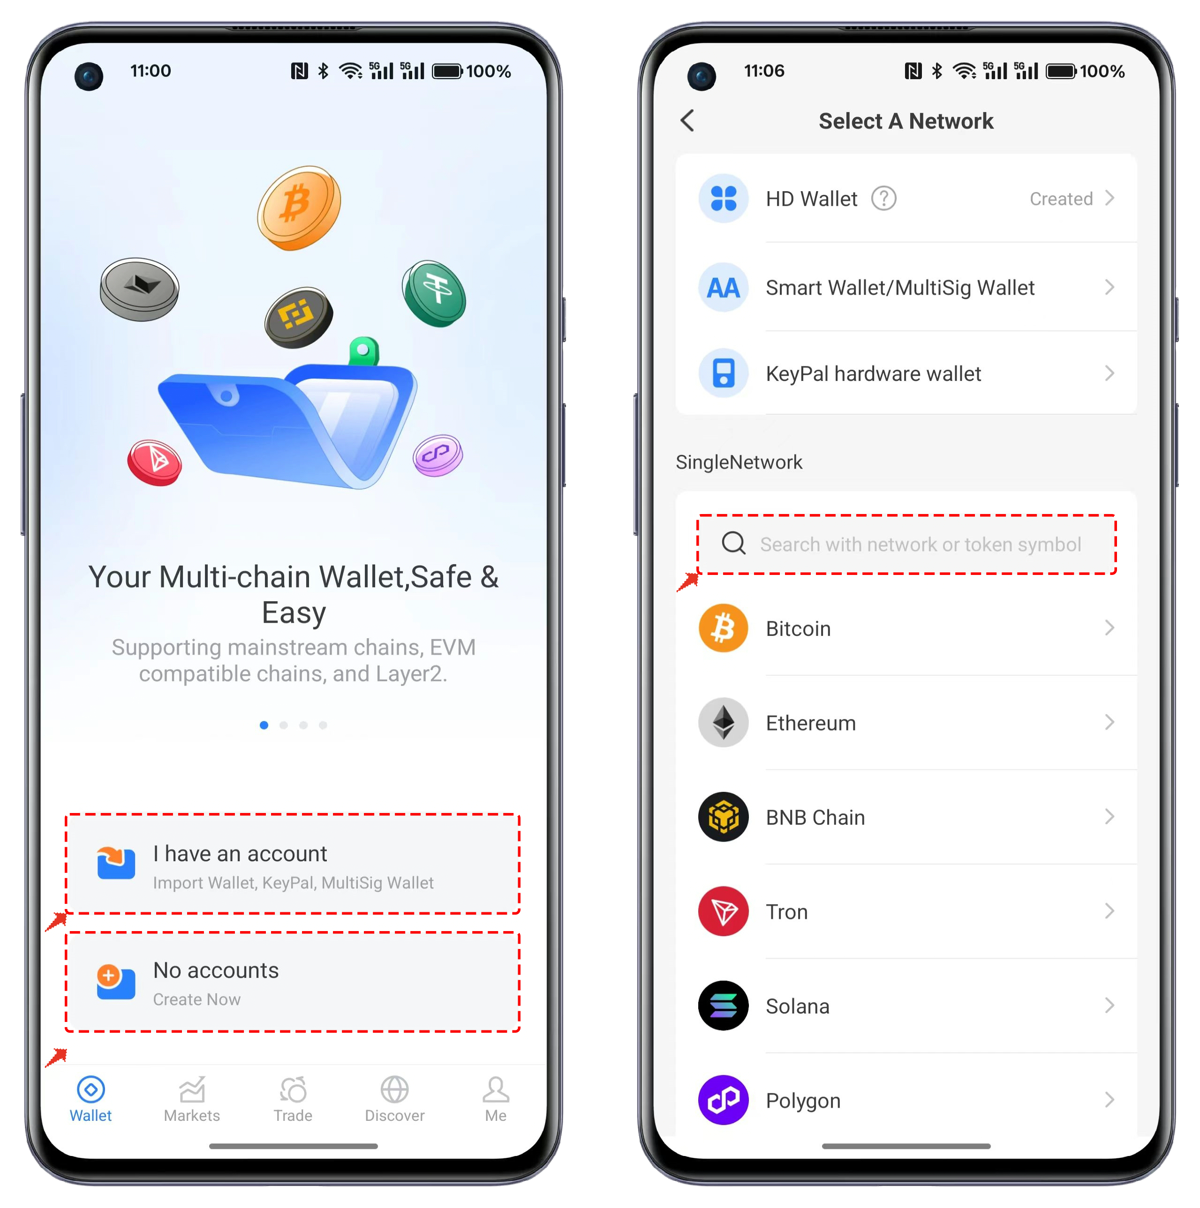
For Existing Users Creating a Wallet:
Open TokenPocket, click the first entry [Create Wallet] in the top right corner of the interface. When selecting the wallet network (blockchain), you can either directly select or search for the desired network to proceed with creation/import.
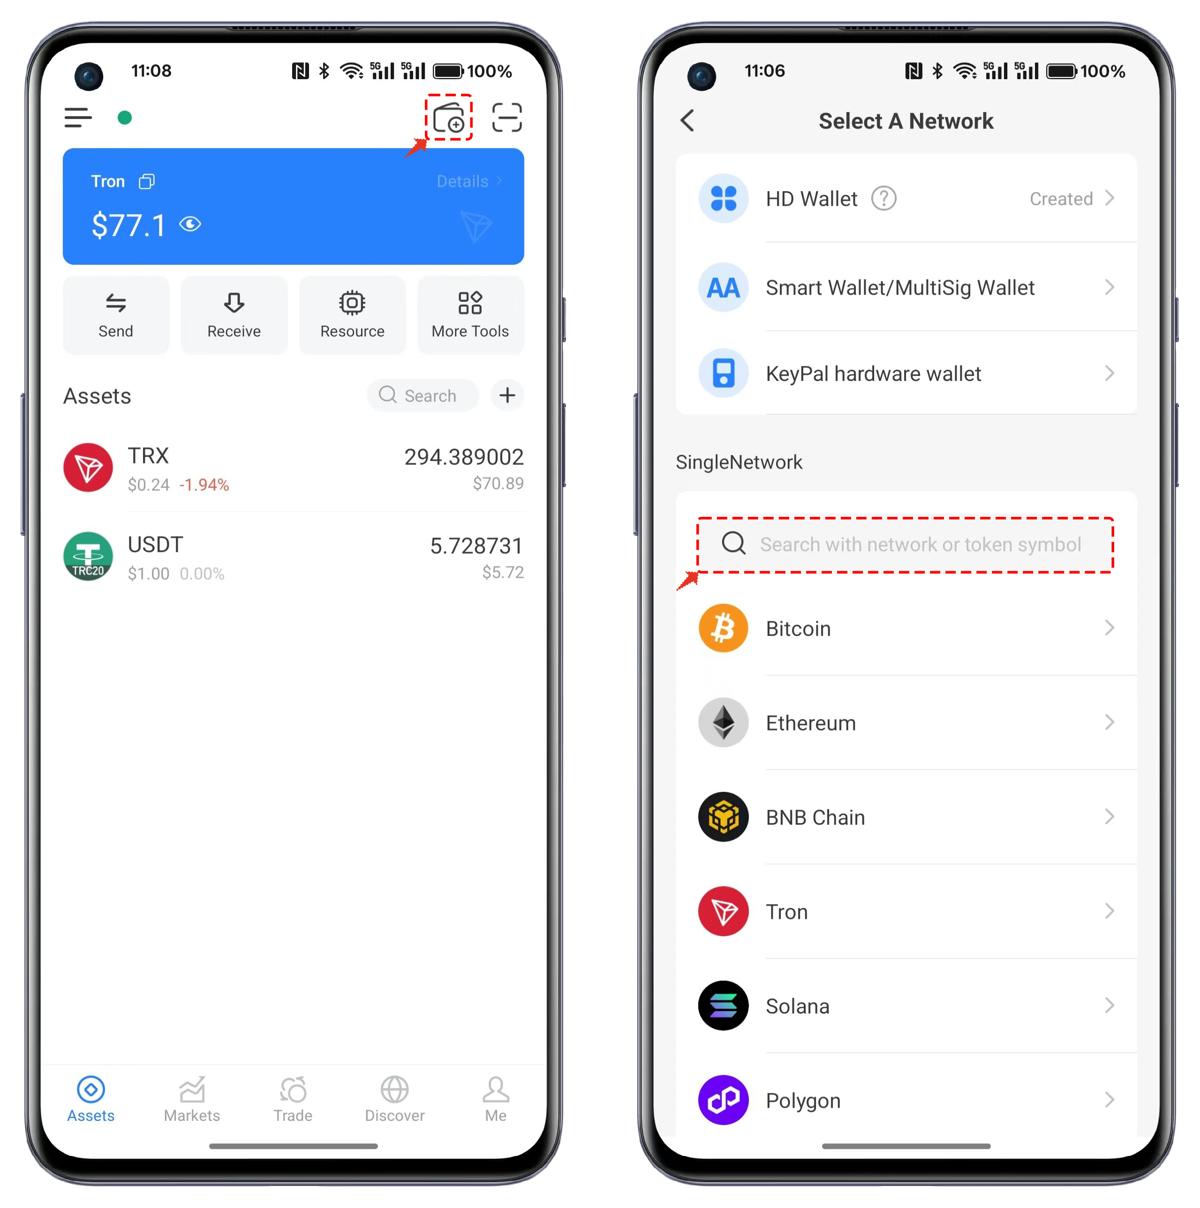
2 Select Wallet Network
Choose [BNB Chain] in the wallet network selection and click [Create Wallet]. In the creation method, select [Create Wallet].
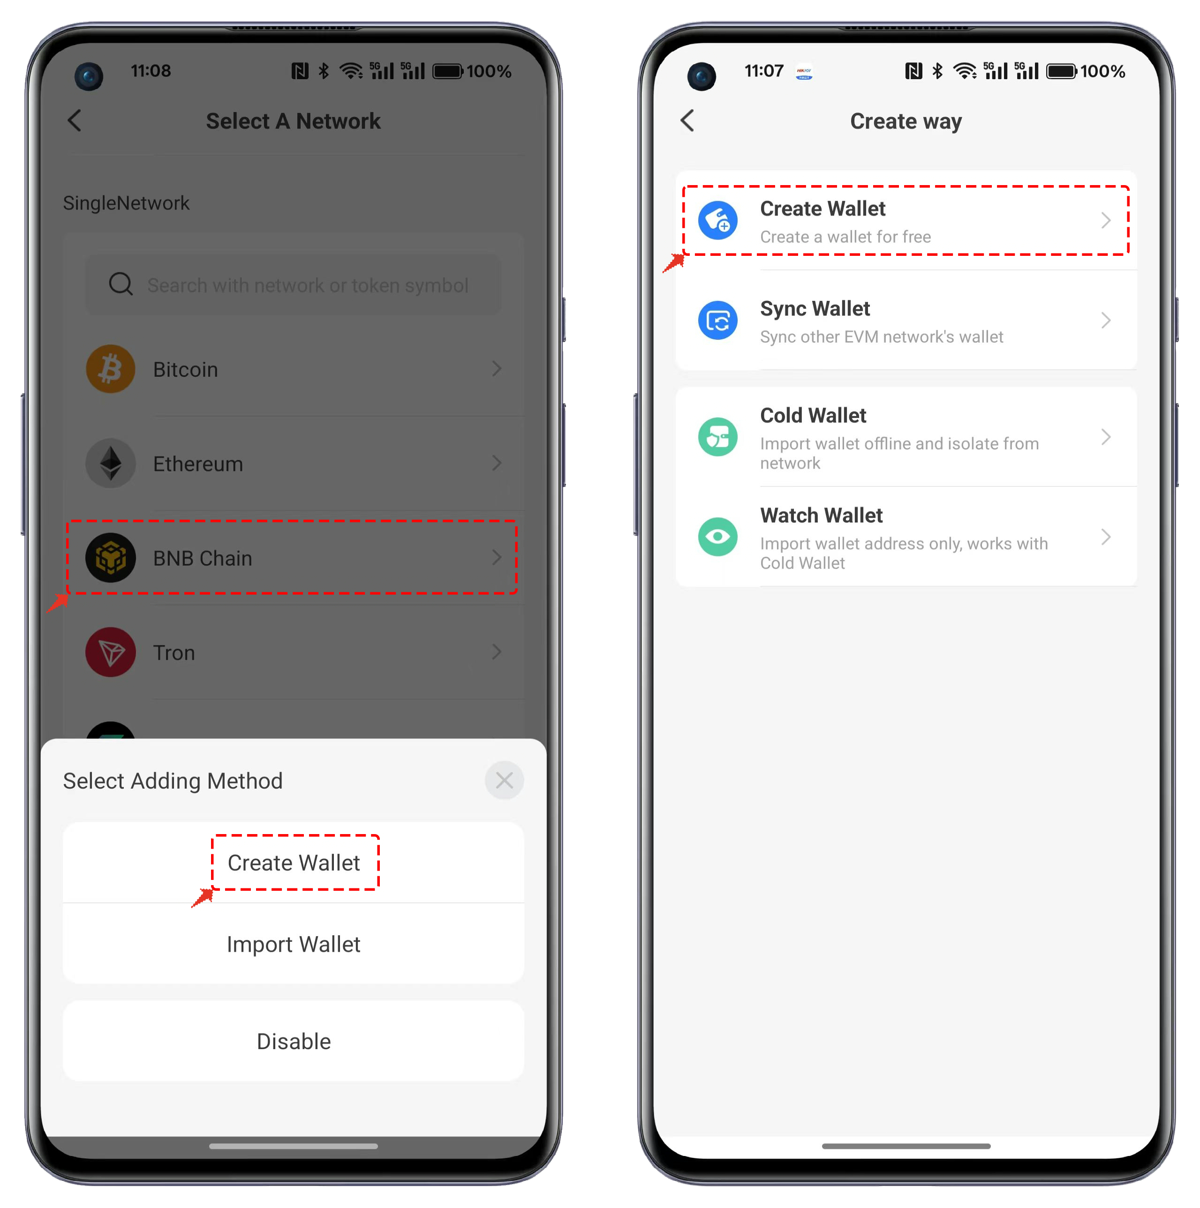
3 Set Wallet Details
Enter the wallet name, password, and optional hint information, then click [Create Wallet]. On the mnemonic phrase backup page, carefully review the security tips and ensure to save the mnemonic phrase using offline methods.
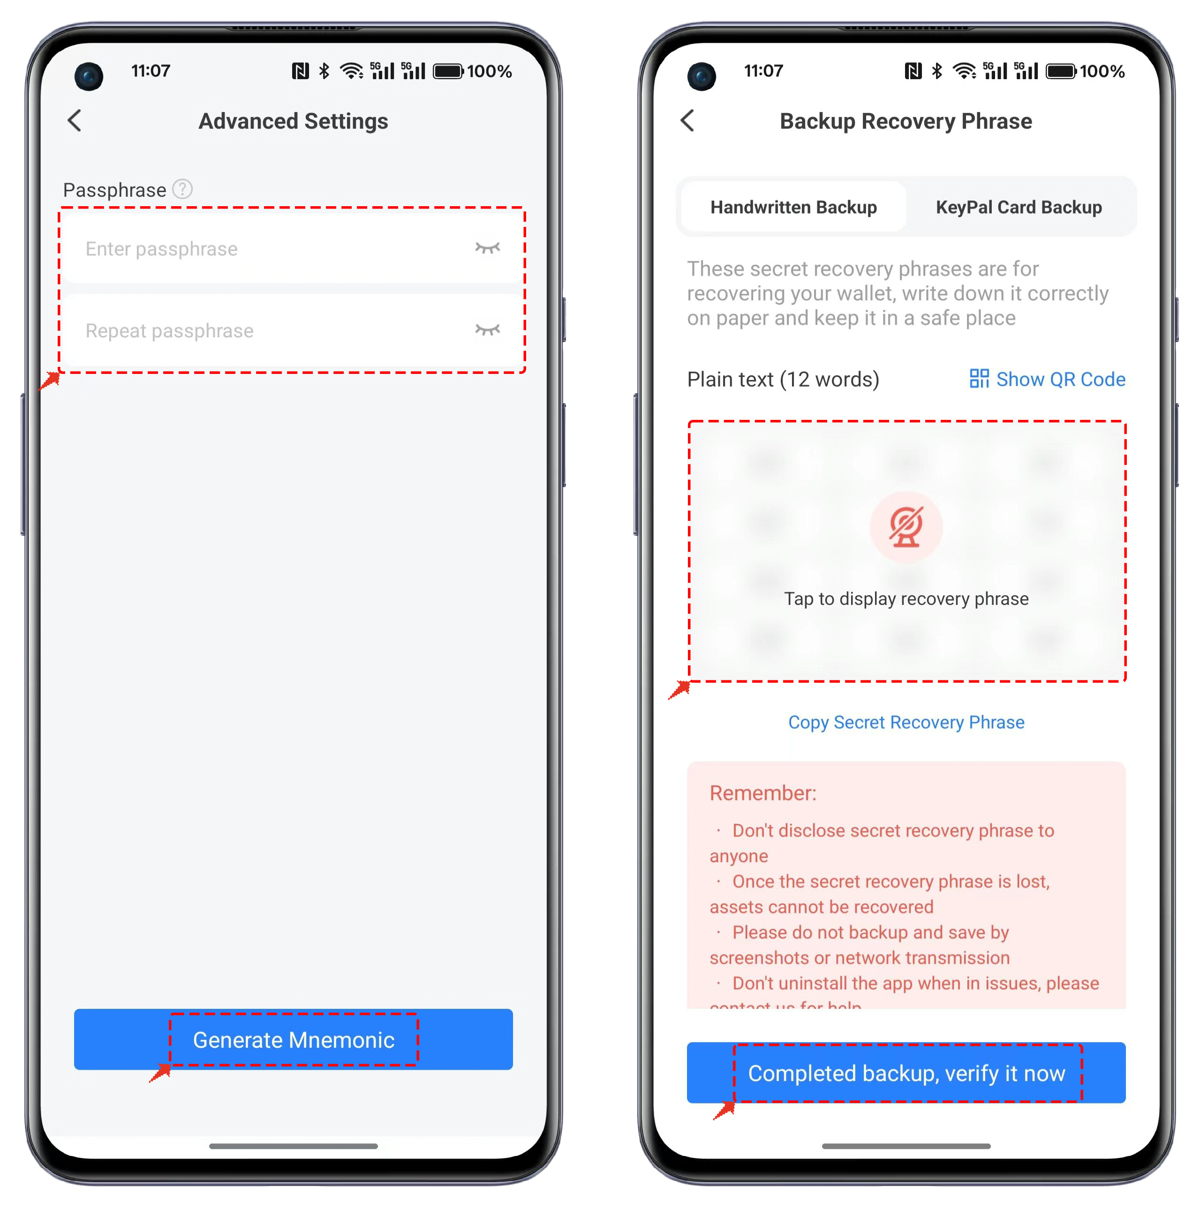
Click [Advanced Settings] to enable the Passphrase option for wallet creation. If not needed, directly click [Generate Mnemonic].
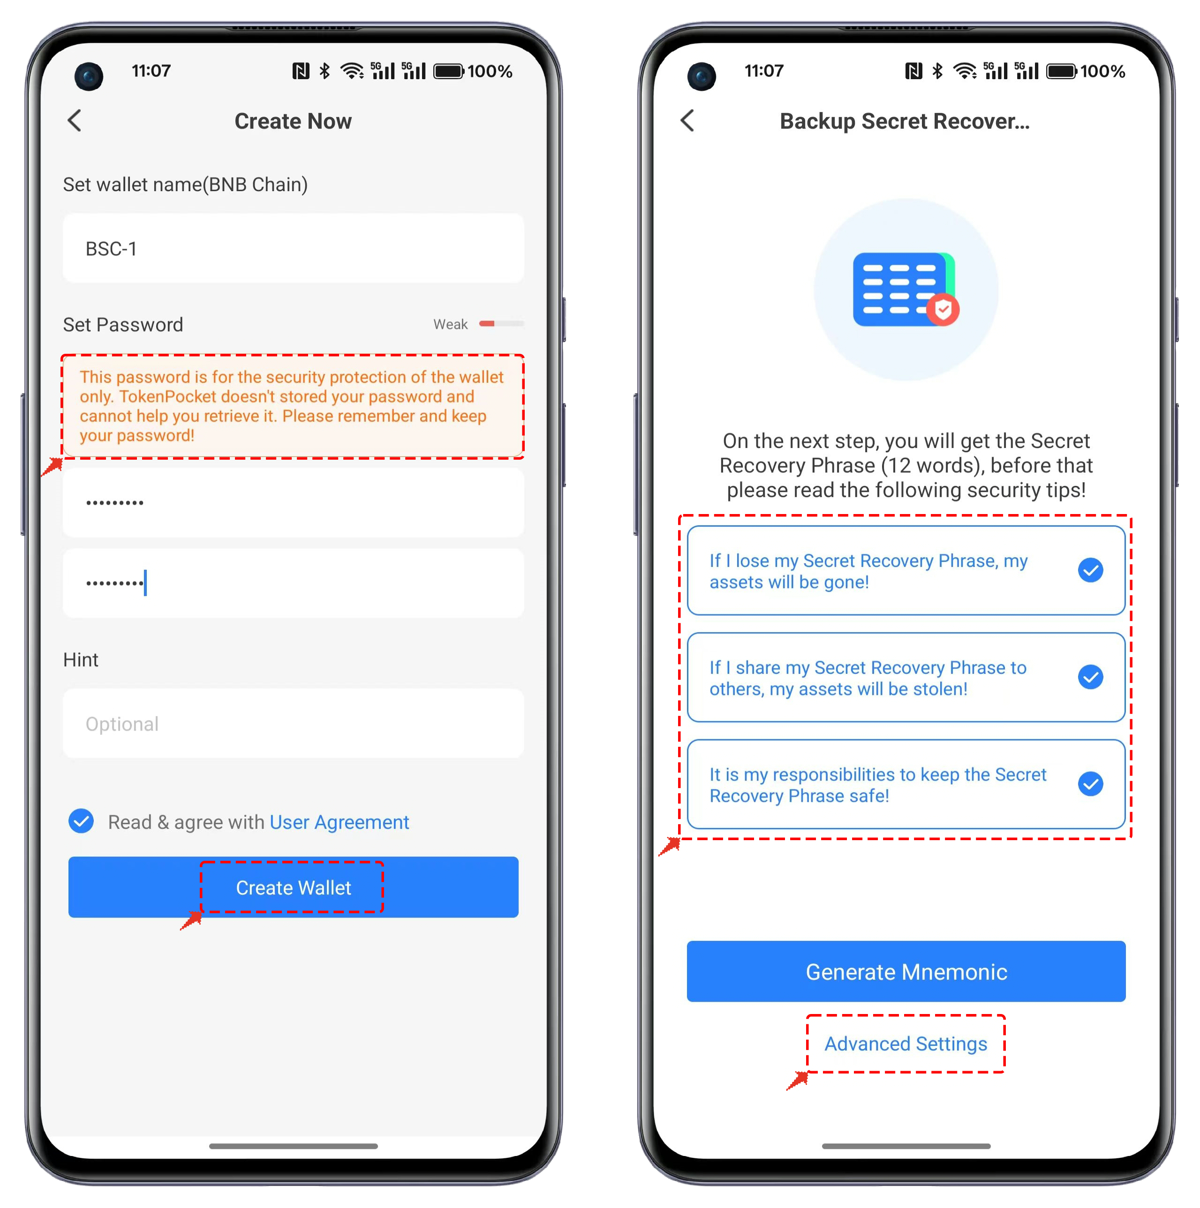
4 Mnemonic Phrase Backup
On the mnemonic phrase backup page, ensure to back up the displayed mnemonic phrase offline. After completing the backup, click [Backup Complete, Proceed to Verification].
If using the Passphrase feature, make sure to remember it. Only the correct mnemonic phrase combined with the correct Passphrase can import the correct wallet.
Recommend: What is the private key, mnemonic and wallet password
5 Verify Mnemonic Phrase
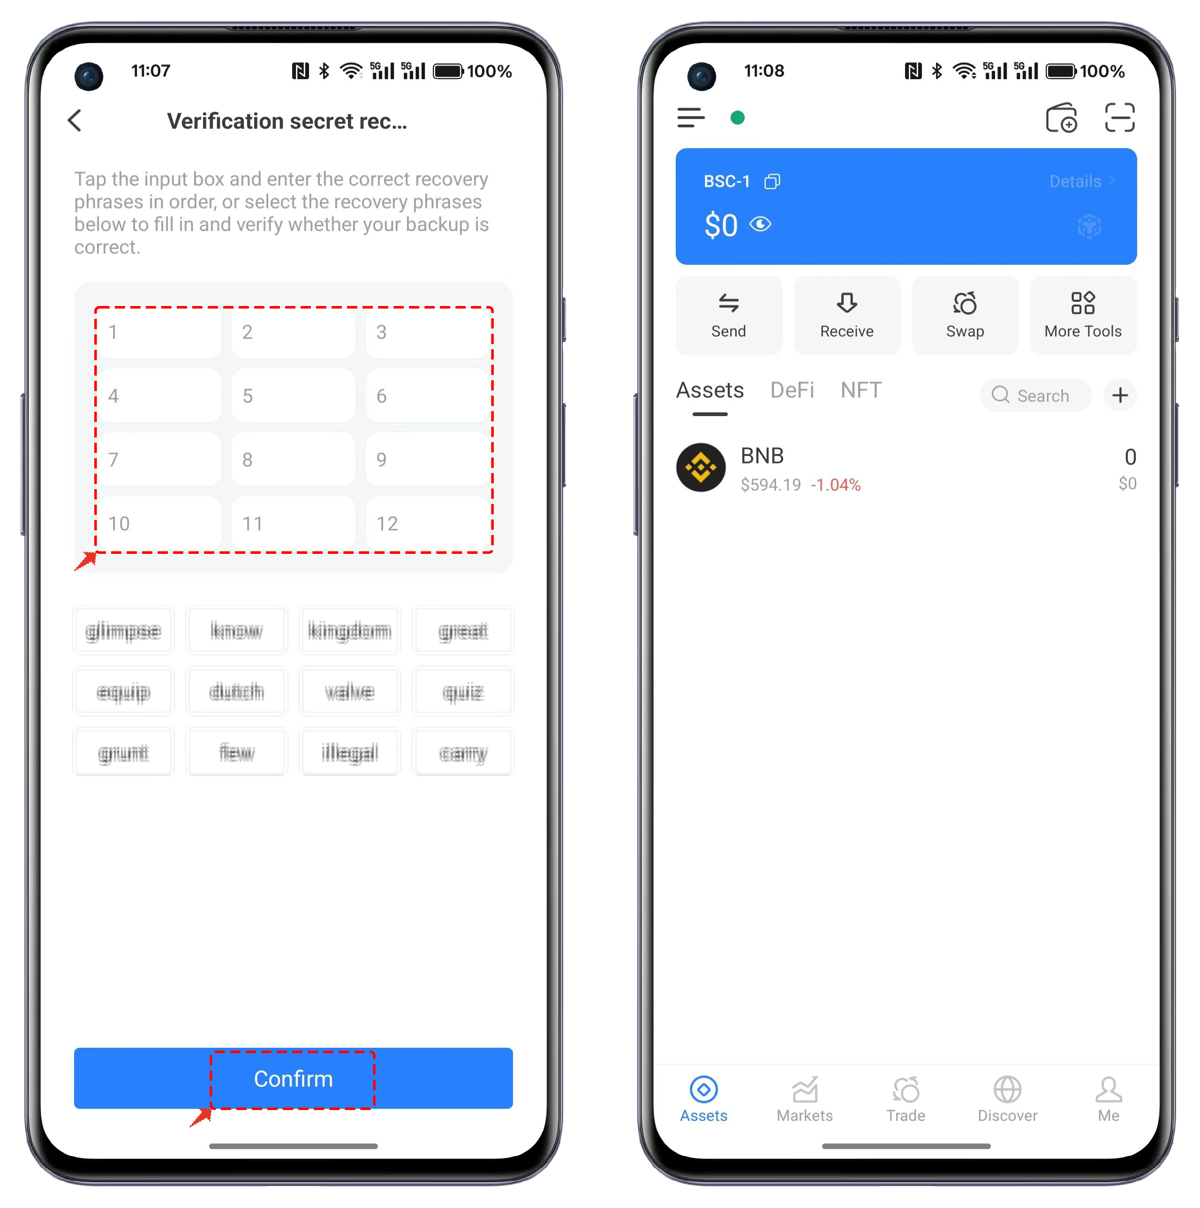
On the verification page, you will see 12 shuffled words. Arrange them in the correct order to pass the verification. Once verified, the BSC wallet will be successfully created.
Attention:
Do not share your private keys or recovery phrases with others, as doing so may result in the loss of your assets!
Part 2: Import BSC Wallet
1 Open TokenPocket
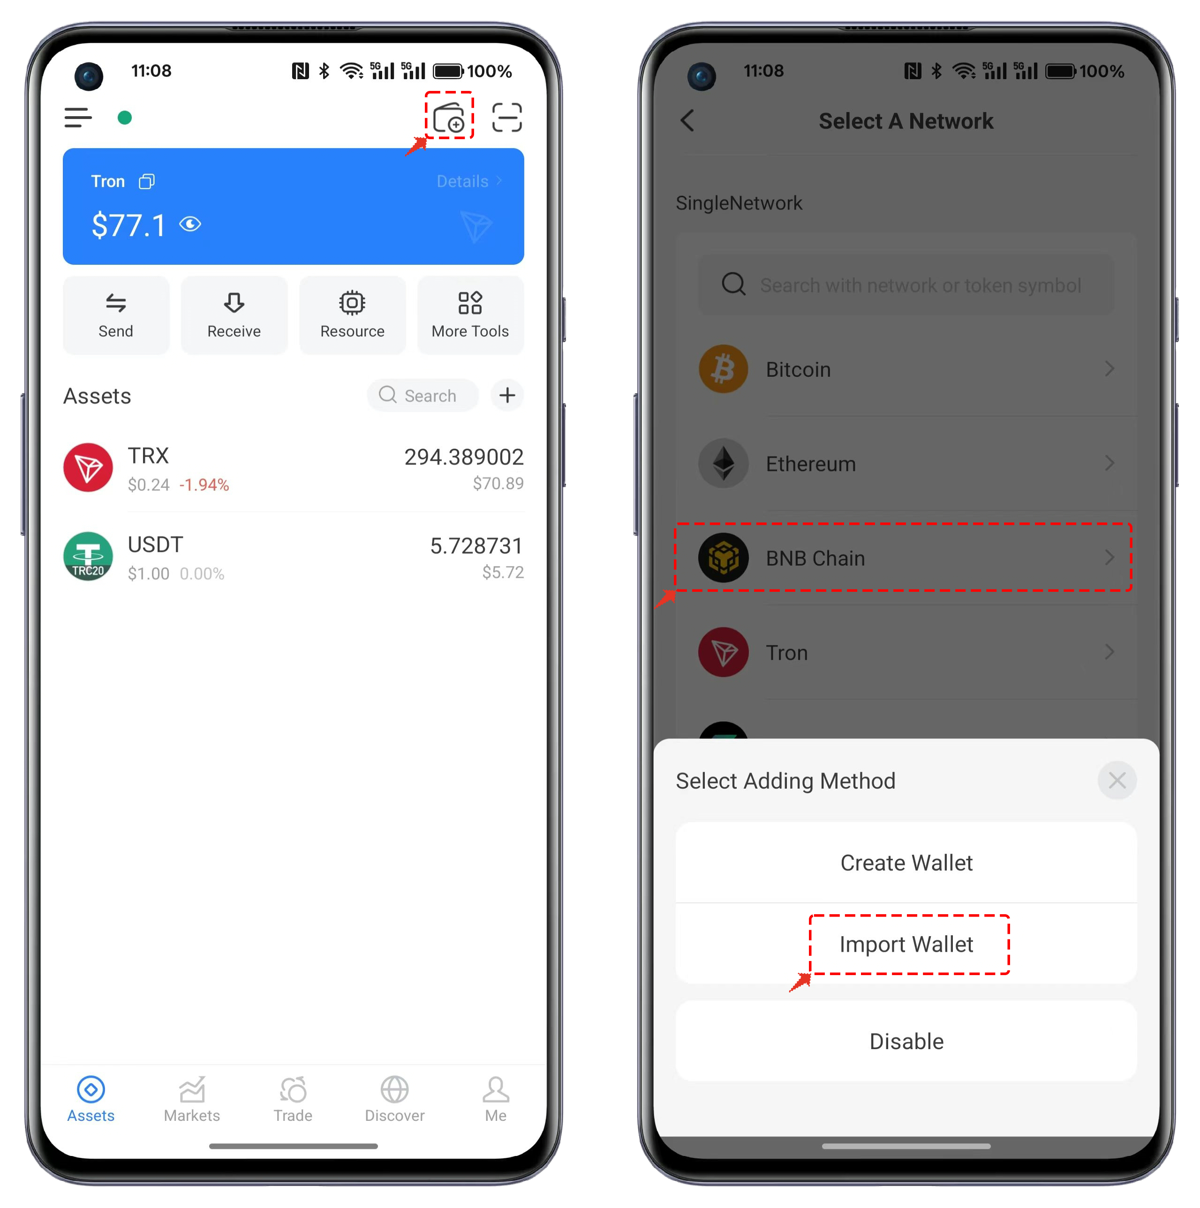
Click the first entry [Create Wallet] in the top right corner of the interface. Select Binance Smart Chain in the wallet network and click [Import Wallet].
2 Choose Import Method
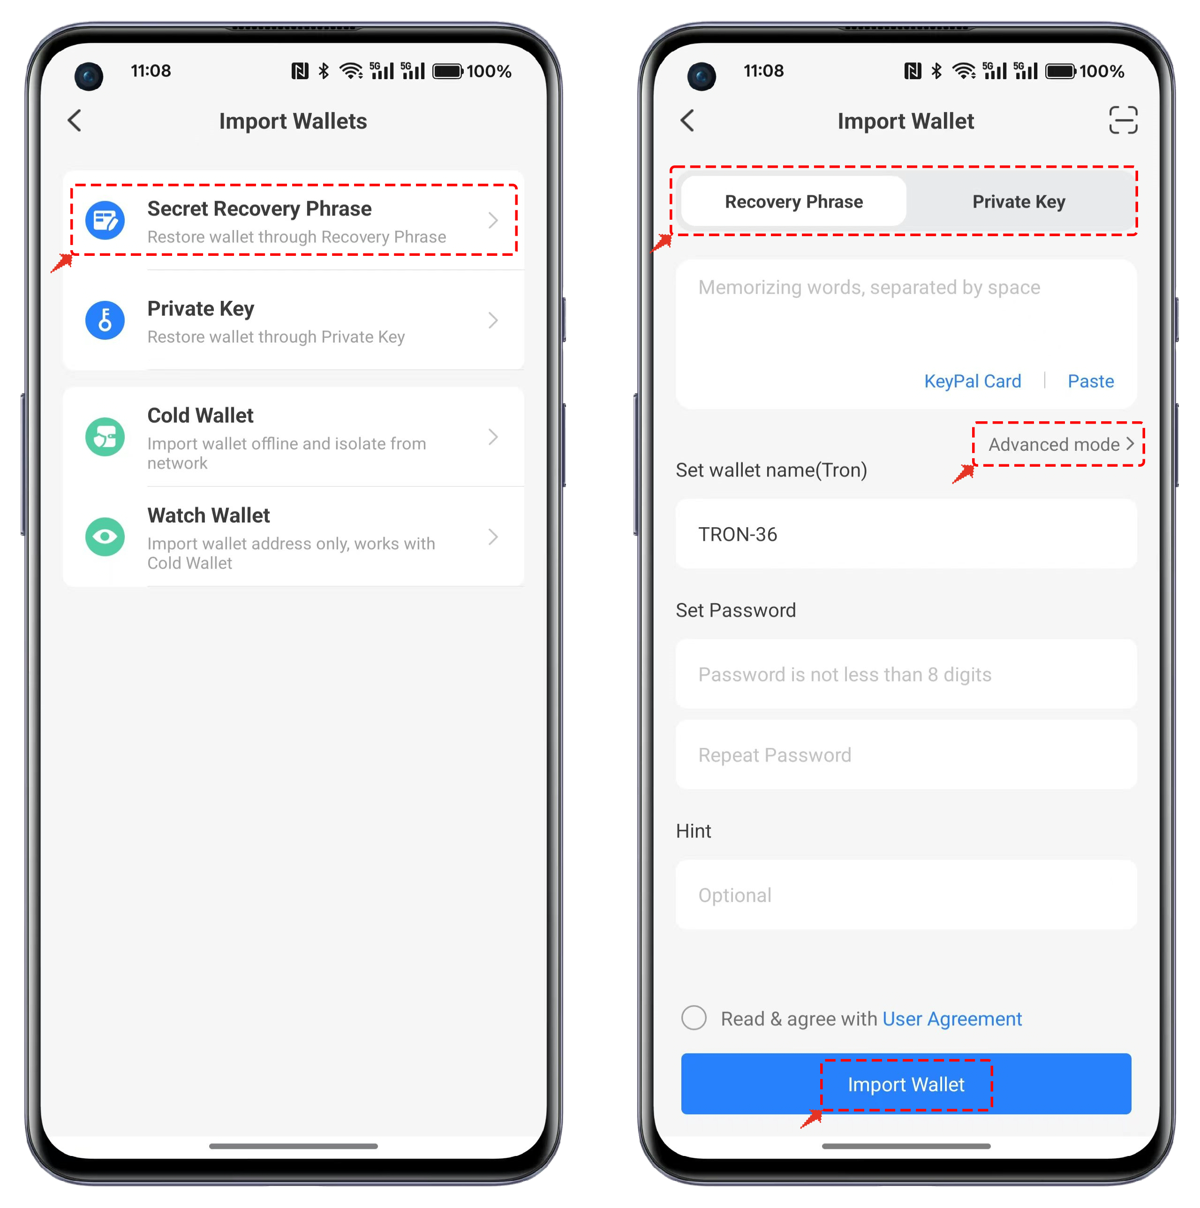
You can choose to import via mnemonic phrase or private key. You can also switch between these methods on the import interface. Ensure you input your mnemonic phrase or private key in a secure environment to prevent theft by malicious tools.
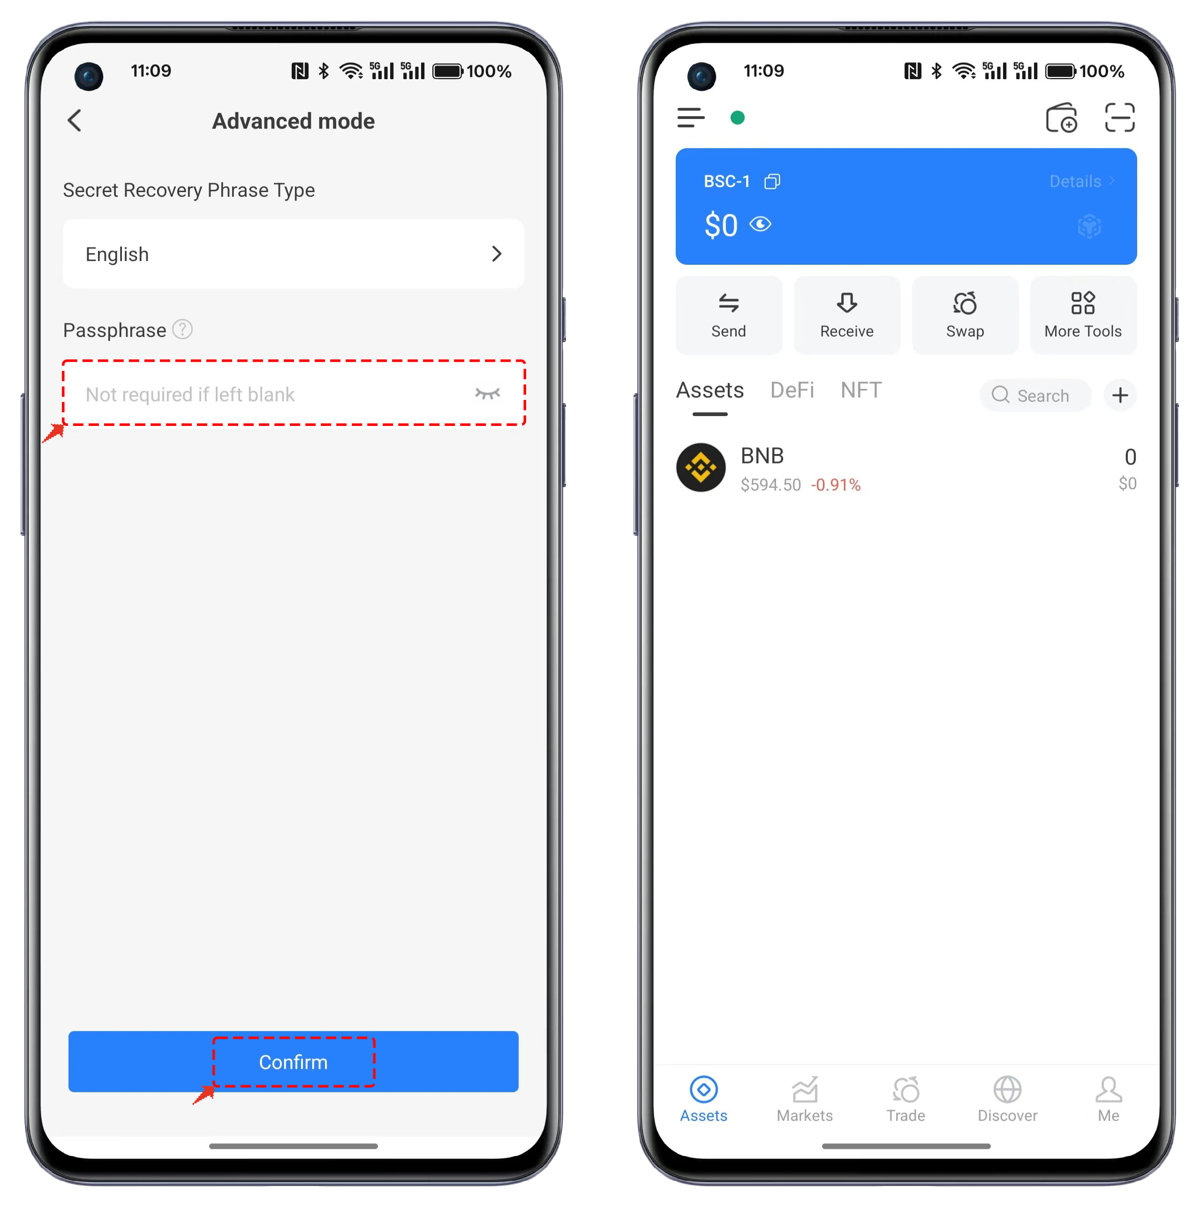
If you have set a Passphrase, click [Advanced mode].
3 Enter Passphrase (If Applicable)
In Advanced Settings, enter the correct Passphrase, click Confirm, and import it into the wallet. This completes the import process for the BSC wallet.
FAQs About BSC Wallet
Now that you know how to create and import a BSC wallet with TokenPocket, you're ready to explore the vast world of decentralized applications on the BNB Chain. Remember, the most critical step is always to secure your mnemonic phrase and private keys. Keep them offline and safe from prying eyes to ensure the security of your assets. With your new wallet, you can now seamlessly engage with DeFi, dApps, and the entire BSC ecosystem.
Download TokenPocket